Simple bullet journal Calligraphy + 27 Simple headers!
Creating headers for bullet journals can be really challenging, especially simple headers for anyone to do! They need to be simple enough for you try and feel confident trying these journal header idea! BUT Bullet journal headers can be so much fun and they are the perfect way to mark the top of your page! Use the headers as page headings, notes headings and more. Turn them into Monthly headers, weekly headings or any other style you can think of! Using the bullet journal monthly headers can really add a fun element to you trying new themes and ideas in your bullet journal!
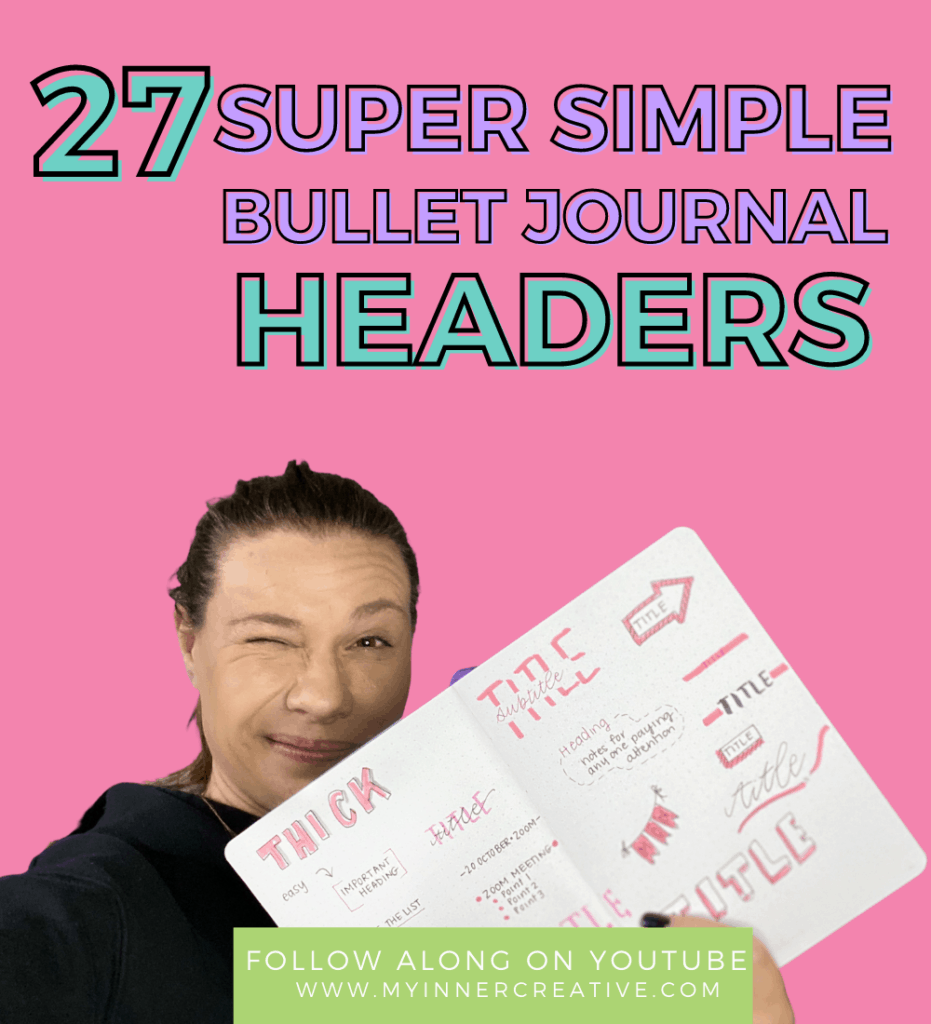
I’m taking a look way back to 2018, my 2018 header guide, and updating it to be on YouTube and including some new styles. I’m going to go through the five key header styles that you can then take and make into your own style. It’s going to be awesome. I’ll show you these styles in detail.
You only need five as a foundation, and then you can build up on them with your own designs and own ideas. So by the end of this, I want to see your amazing styles. Show them to me. Okay. Over on the website, I have a ton of additional examples for you. You can also sign up to grab all of our freebies in the link below. If you want to see more of these types of videos, please hit the subscribe button and click that bell to get those notifications.
Now, you’ll see from the old posts that it was over two years old. From here, I’ve now grown an audience of over 100,000 on Pinterest with my crazy suggestions. Well, that post was actually one of my more popular posts when I first started out blogging. And the ideas that I came up within that were really simple for people that were starting out to do. So, if you’re a beginner, and if you’re a bullet journal beginner, this is definitely the video for you to get you started with some of those really creative headers. Let’s dive right in.
Watch the how to video here:
All right. What are some of the things we’re going to need to get started? We’re going to need a bullet journal. We’re going to need a fine liner, a brush pen and a Crayola.
Now I’m not using the Tombow dual brush markers or pins because I thought Crayolas are far cheaper and they achieve the same effect. So these are the three key things we’re going to need. And then obviously a notebook to write in. You’re going to want to set aside a special page for your hand lettering today. It could be any page in your notebook, but I am taking this particular page and I’m just going to put a border around it. A simple border, just to give it some space and be very clear about the area that I’m going to be using for practicing these lettering techniques in.
We have all been there – its hard to create something pretty sometimes! Calligraphy and hand lettering is no different! And calligraphy in your bullet journal can be hard and takes weeks, months or even years of practice.
So I have taken some time to not only show you step by step, but round up some really great header posts for additional inspiration! Calligraphy is probably the hardest and there is hand lettering how-to’s everywhere.
There are piles of videos and templates, but really, the best thing you can do is practice! I have been practicing for years, so I realize it can look easy and then you try and it looks like a mess. Don’t think I didn’t start out looking messy and sloppy!
Of course I did! My natural handwriting is messy and big and sloppy and Im ok with that! I cannot express enough though, that drills are key to improving your strokes. So that is where we started! And also – I have decided to sacrifice my mint colored Lemome journal to all these “How to” posts!
Bullet journaling has become an increasingly popular method for organizing and expressing creativity. One of the most visually appealing aspects of bullet journaling is calligraphy, especially when it comes to headers. Headers not only add structure to your journal but also offer an opportunity to infuse your personal style into your entries. In this blog post, we’ll explore simple calligraphy techniques and provide you with 27 easy header ideas to elevate your bullet journal’s aesthetic.
Getting Started with Calligraphy:
Before diving into header ideas, let’s cover some basic calligraphy techniques to ensure you have a solid foundation:
- Choose Your Tools: Opt for pens with different tip sizes. Brush pens work great for bold headers, while fineliners are perfect for intricate designs.
- Practice Strokes: Get comfortable with basic calligraphy strokes—upstrokes and downstrokes—to create consistent lines with varying thickness.
- Lettering Styles: Experiment with different lettering styles like cursive, block letters, or a mix of both. Find a style that resonates with your journal’s overall theme.
- Spacing: Maintain consistent spacing between letters to ensure readability and aesthetic appeal.
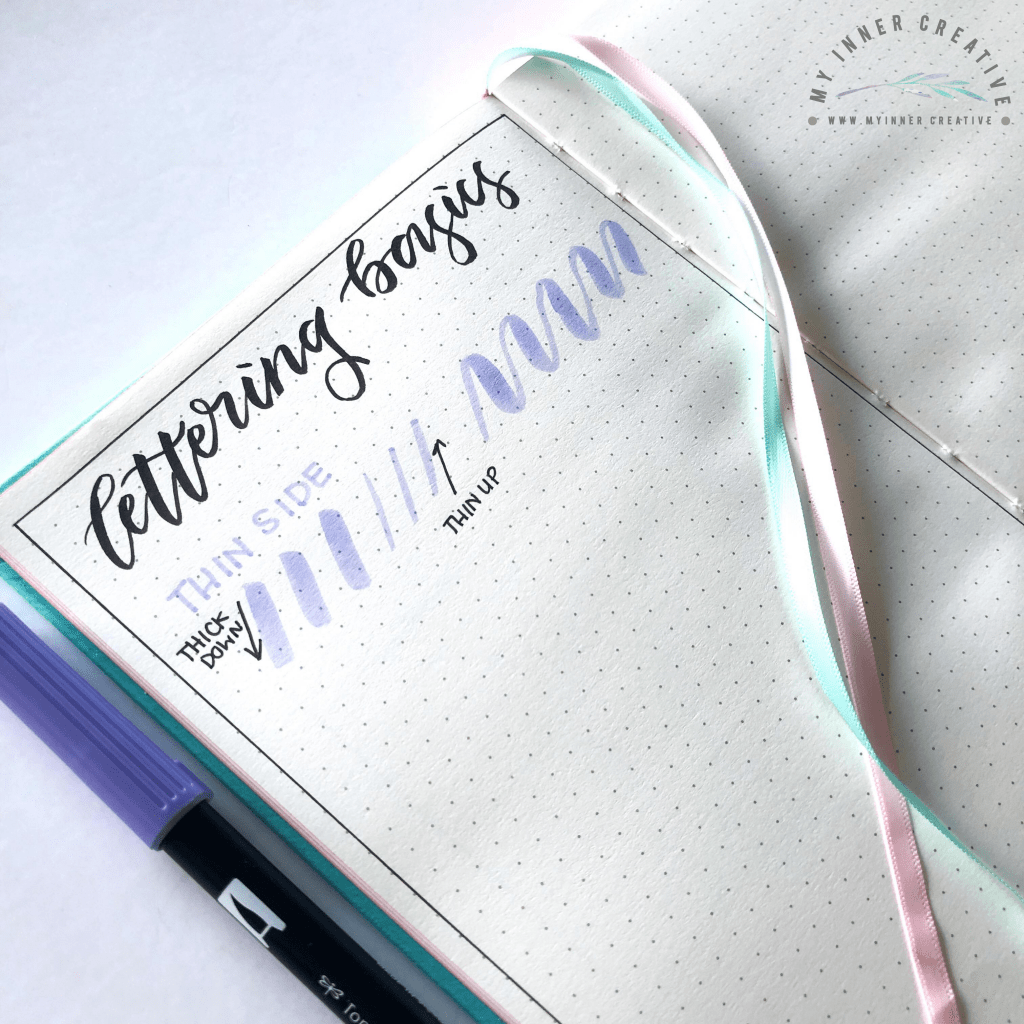
Trick 1: Practice lettering and handwriting strokes in your bullet journal
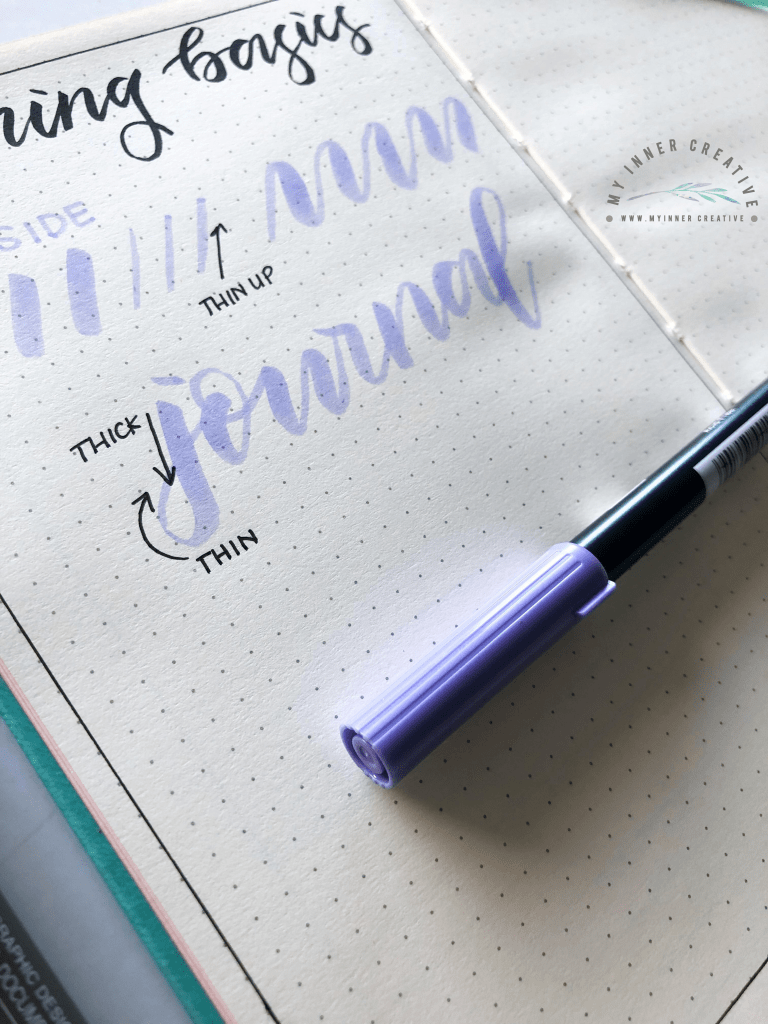
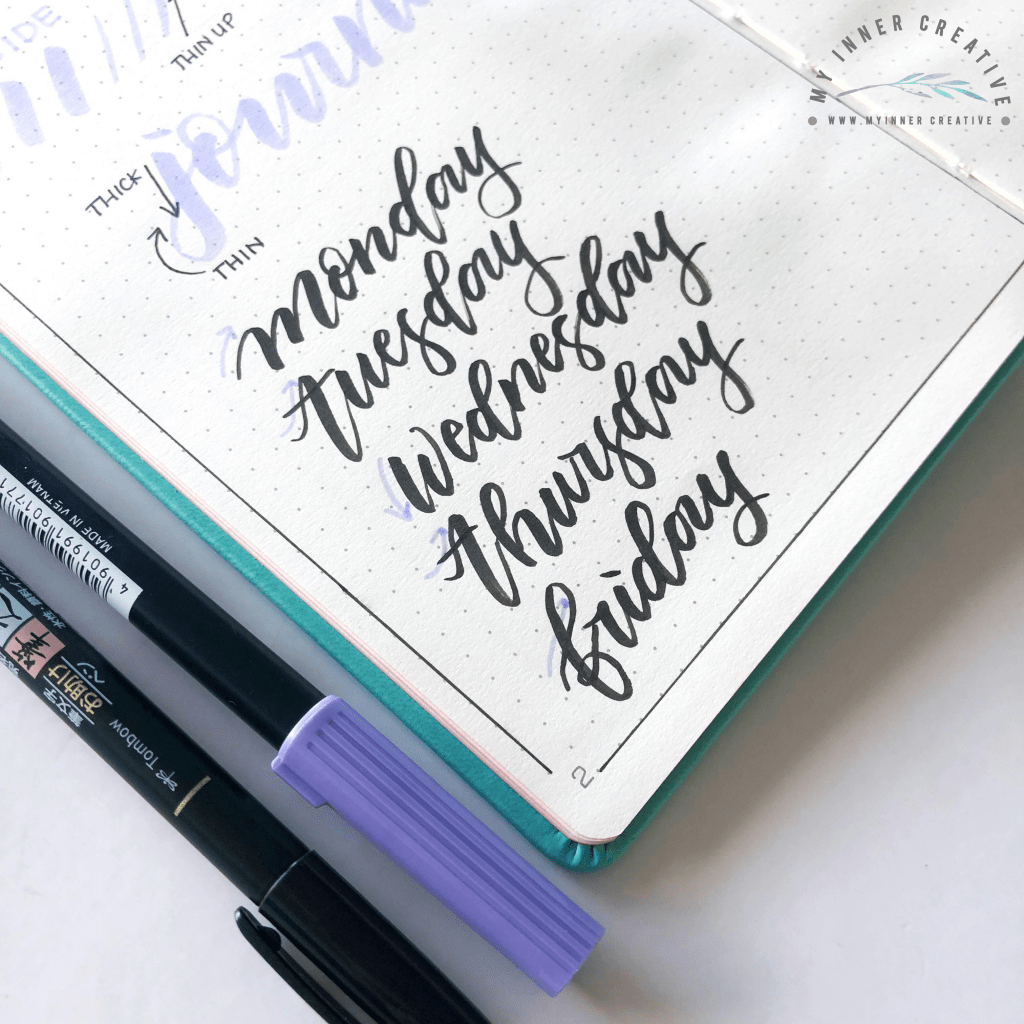
If you already own a brush pen then start practicing your up and down strokes. Up is always light ant thin, and down is thick. The best drill for this is making a wave. I find that I hold my breath on the upstokes! I dont recommend this but I found it helps me! The pressure you apply is crucial, dont be shy to test your pen pressure, quite often, I have found in our brush lettering workshops and classes people didnt realise how much pressure you can actually apply to the down stroke.
Now, before we even get started, we’re going to practice our hand lettering a little. And we’re going to practice our down strokes which are always thick and our upstrokes which are always thin. Now we’re going to practice them together. Now we’ve practiced a little with the Crayola, we’re now going to take the brush pen and do the same thing. Now let’s try this with a simple word. You can see here that the down strokes are thick and the up strokes are thin. Let’s try some other simple words. Remember to try out different letters as you go. Okay. The first style we’re going to try is fake hand lettering or faux hand lettering.
Ive included some days of the week to show you how they start, some start with a thin up and some start with a the thick down stroke.
In our freebies section we have some gorgeous lettering practice pages, for all sorts of lettering styles, and in our exclusive section we have our workshop books covers off hand-lettering!
Trick 2: Fake Calligraphy in your bullet journal
Fake brush lettering! This is such a simple trick and can look so effective!
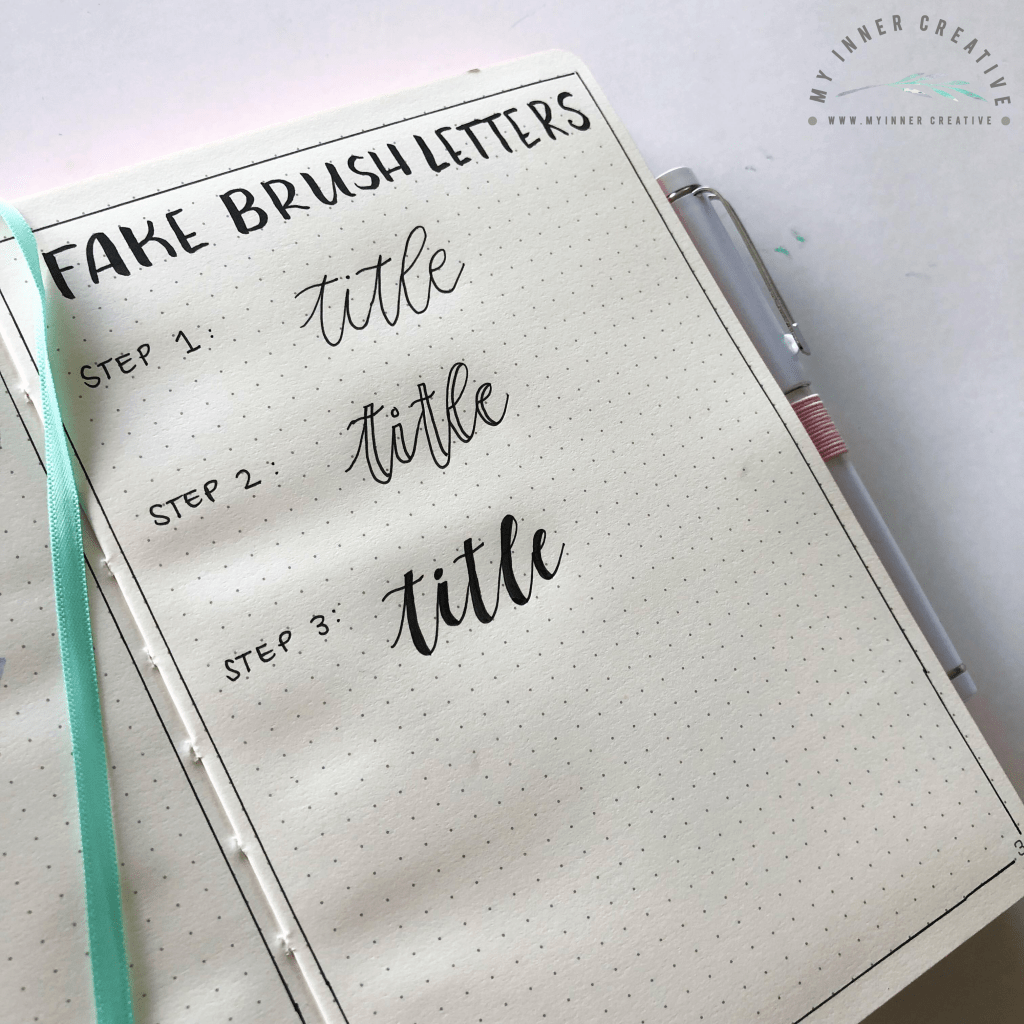
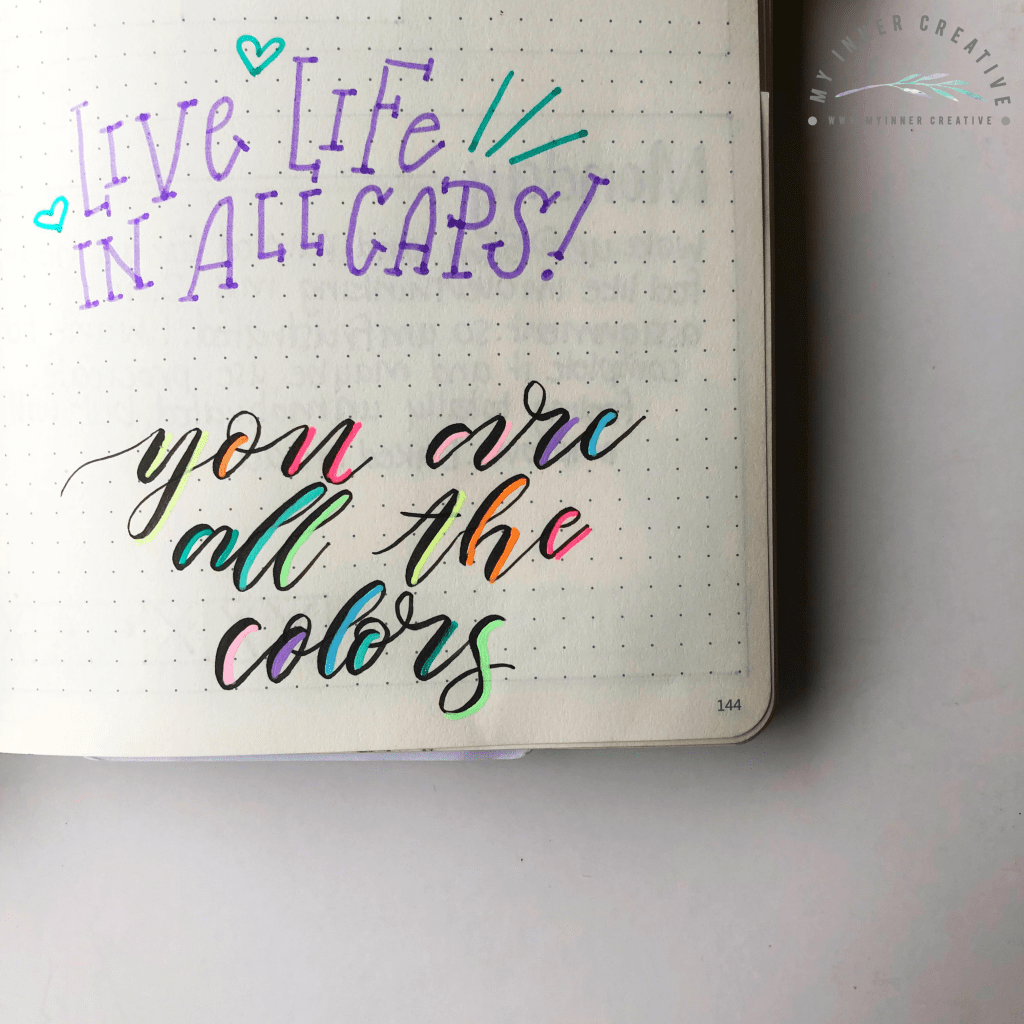
What we’re going to do is we’re going to do it in cursive. We’re just going to do a simple word in cursive. I’m going to say Monday. And from there, we’re going to kind of open up the letters a little bit. If we were to do it in normal cursive, this is what it would look like. But we’re going to open this up a little bit so we can create that faux lettering. Once you’ve opened it up a little bit, we’re now going to imagine where we would have those up and down thick and thin downstroke. Now you’ve got a really simple looking fake calligraphy pin style. You can see there’s quite a difference.
- Here I am using my artline drawing system pen at 0.4mm. I use basic cursive to write a title. You want to make sure you have enough space to go back and draw in the “fake” down strokes.
- Go back to the beginning of your title and for each down stroke, create a “shadow line” or line that comes down right next to it.
- Color in the spaces, you can do this one of 2 ways, either use a brush pen to do this, or colour it in using a black pen or coloured pens.
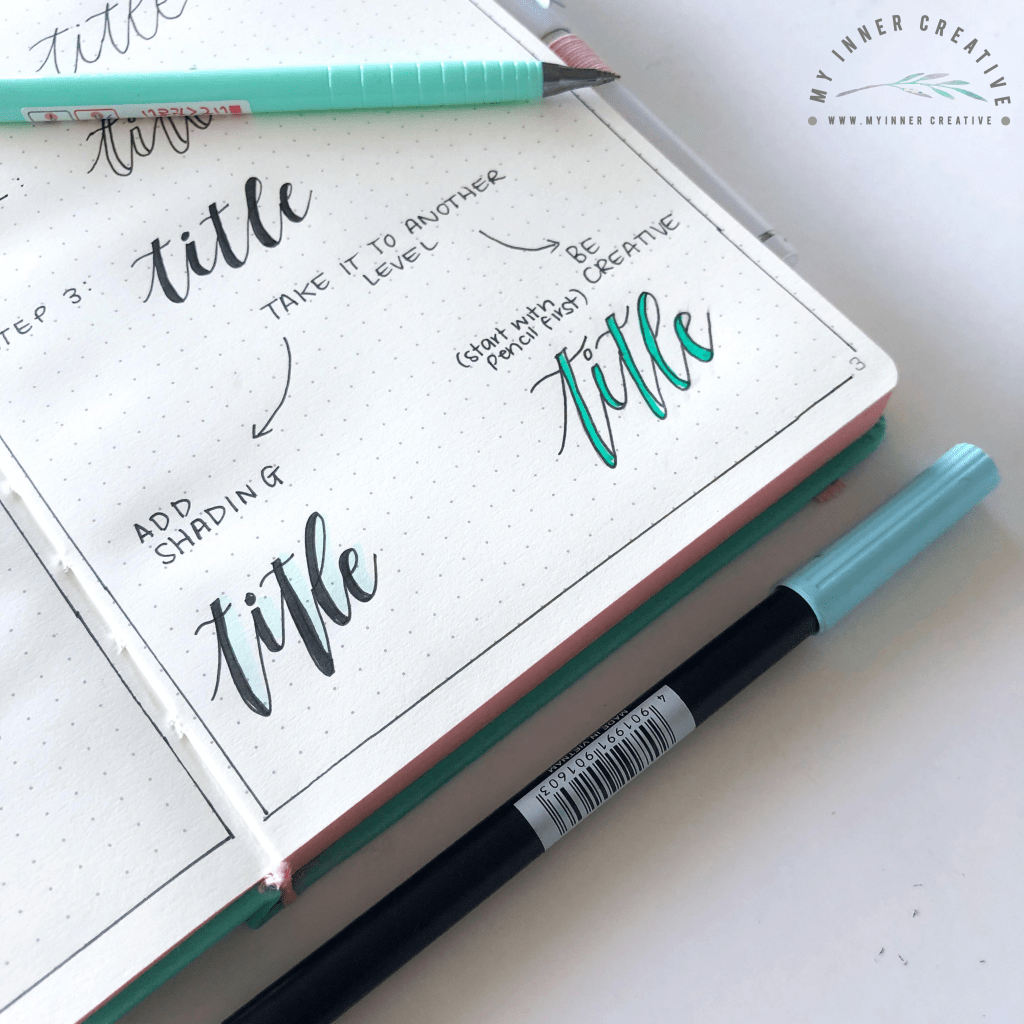
- Take it to the next level, add a colored shadow or color in the blocks with a different color.
In the video above we’re going to write the month, which is October. Again, we’re going to go back and all the down strokes we’re going to make thicker. All right. Super simple. Now let’s take it one step further.
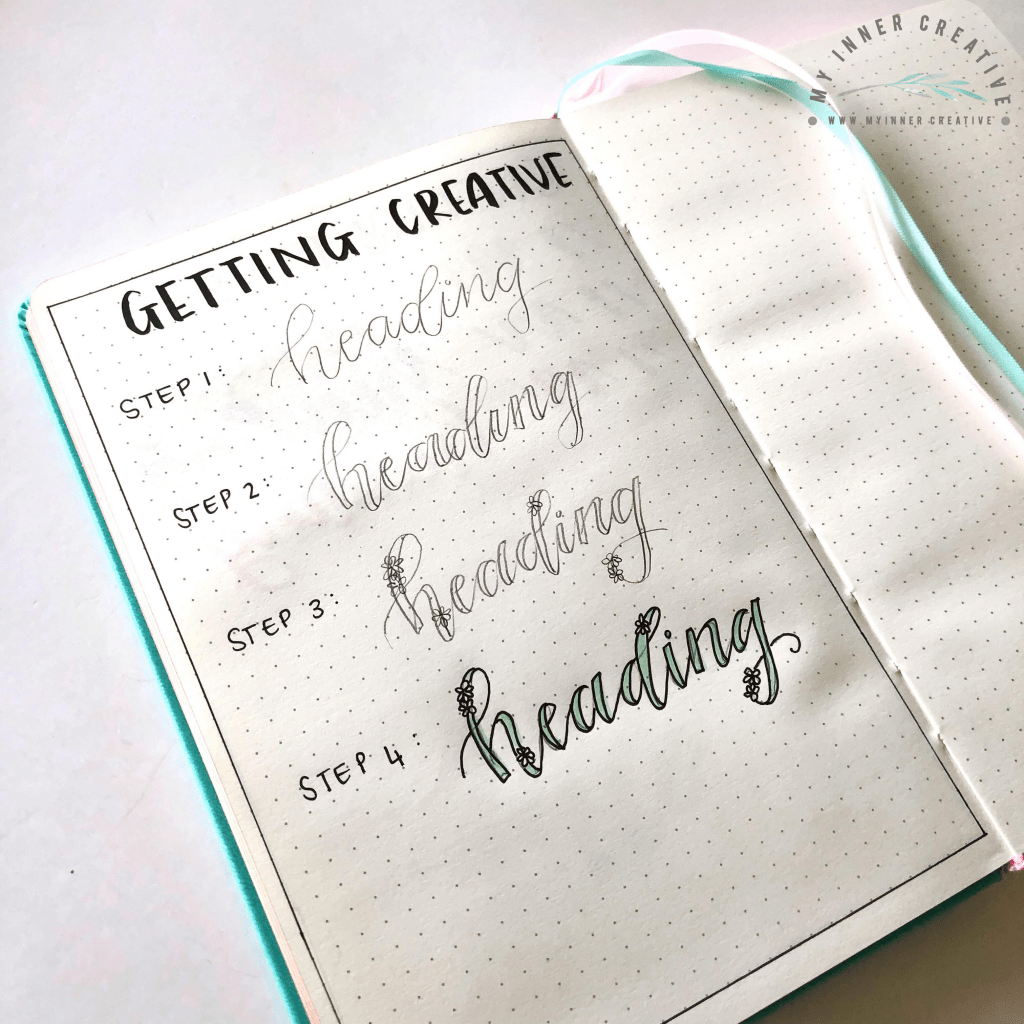
We’re going to create shading on one side. Okay. Let’s get a little creative with the style now. We’re going to keep the same style of us filling in the letters. But this time I’m going to take a pencil and we’re just going to do exactly the same thing but this time I’m going to write header.
This time before I use my pen, I’m now going to go back and do those thicker lines where the faux calligraphy should go. All right, now we’re going to really simply add some little flowers. Once those are in, we’re now going to go through and fill in the thick lines first. Now, instead of filling it in with black, we are going to take a color and we are going to fill it in with color. And how easy peasy was that
We’re going to build again on this process. And this time what we’re going to do, is we’re going to do exactly the same thing but this time we’re going to make it a fake ombre. So again, take your pencil that you’re going to need and write in heading.
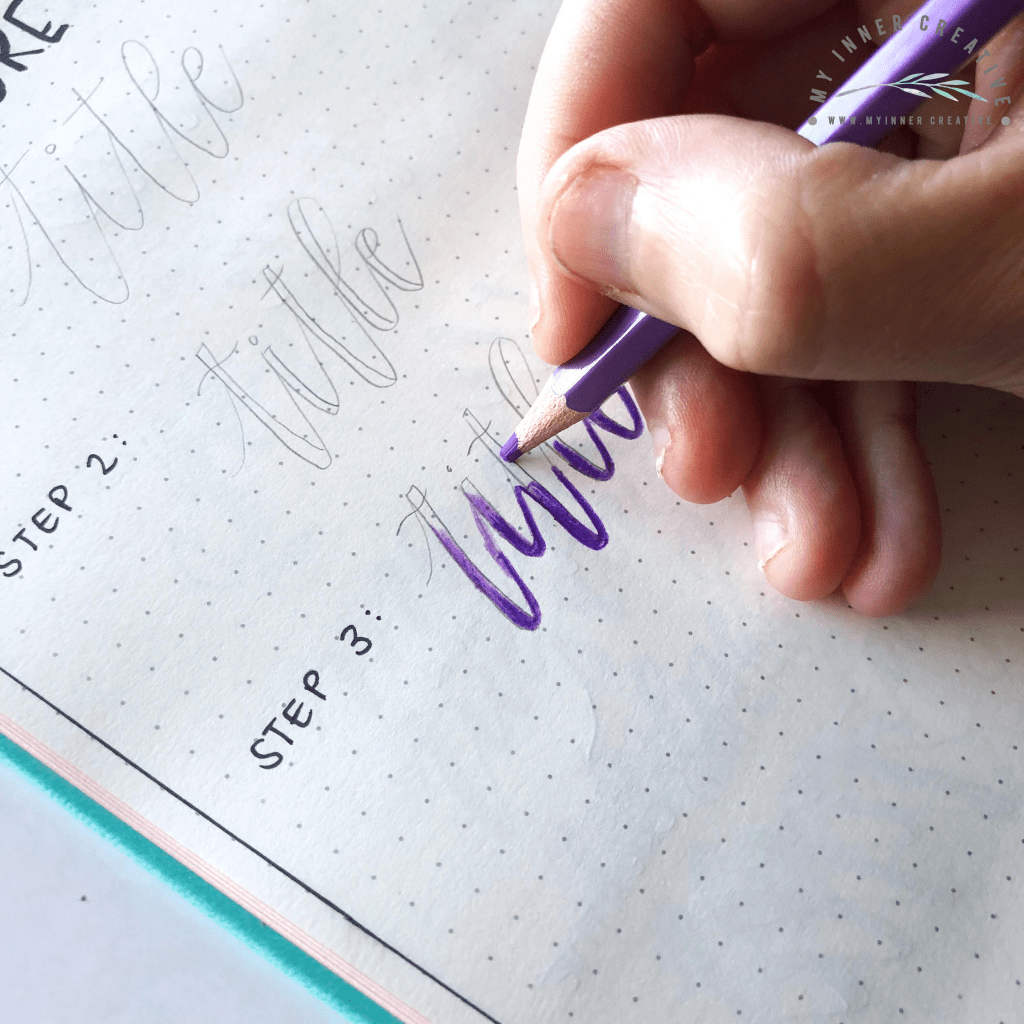
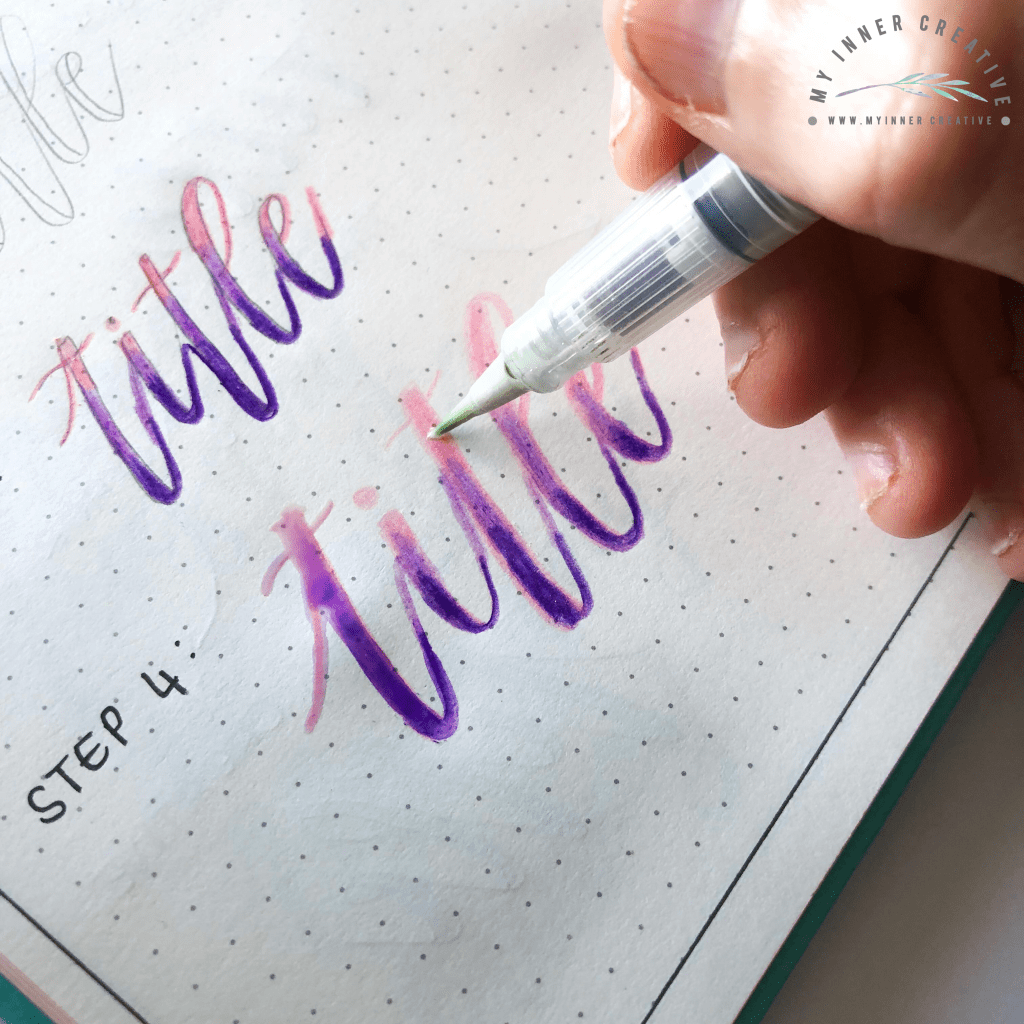
All right. This time we’re going to do the same thing, but we’re going to color in the letter. So, we’re going to say all this bottom part here is going to be a nice dark purple. Now, you can go ahead and blend this with some [inaudible 00:07:50] as well. It’s not a requirement, not necessary, but it does look really cool if you do. Okay. Now we’re going to try some simple outlines.
Trick 3: Creative Calligraphy in your bullet journal
Lets get a little more creative! Using the above process, but starting in pencil, add some sweet little floral elements!
Trick 4: Fake Ombre Lettering
- Use a pencil to lightly cursive your word
- use the above process to create boxes to color
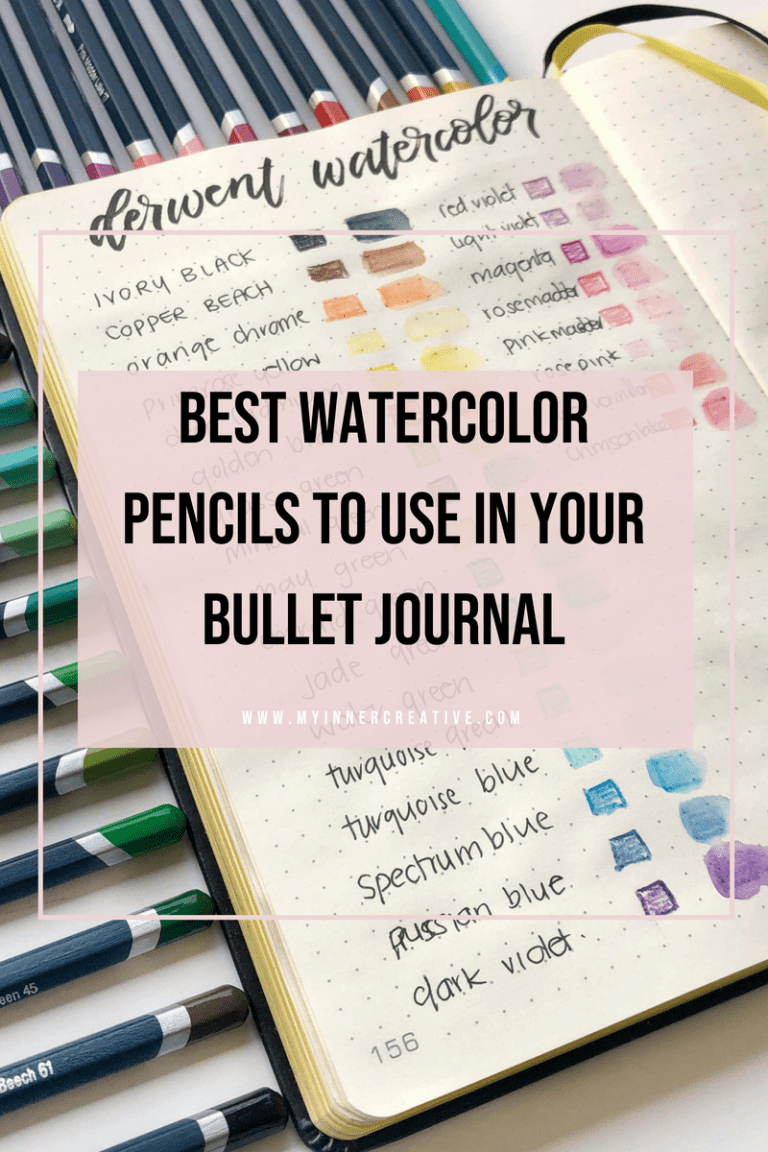
- Color in with water color pencils, I used Derwent watercolor pencils.
- Use just a little water and work from light to dark
- Let it dry
Trick 5:
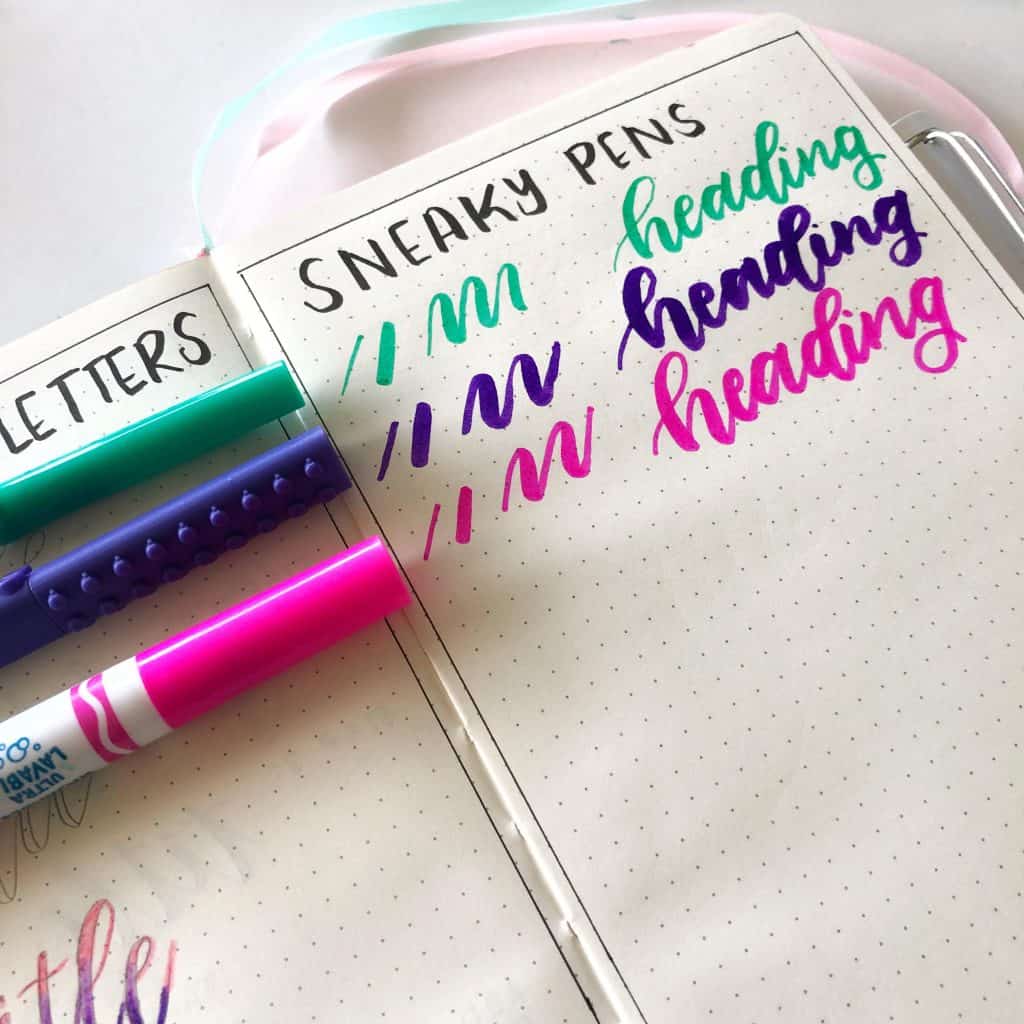
Now this is a simple and pretty straight forward sneaky trick, the simplest way to create cute headers is to practice with cheap and easy to use pens, here we have super tips, artline stix, and standard crayolas, they make a great impact and you can blend them with a little bit of water.
Not to much water though! But just a little to mix the colors. These are great because they don.t cost a fortune and come in Hundreds of colors!
Trick 5: Try different things in your bullet journal!
Try giving your headings a boarder, or shading them in such a way to look like a ribbon
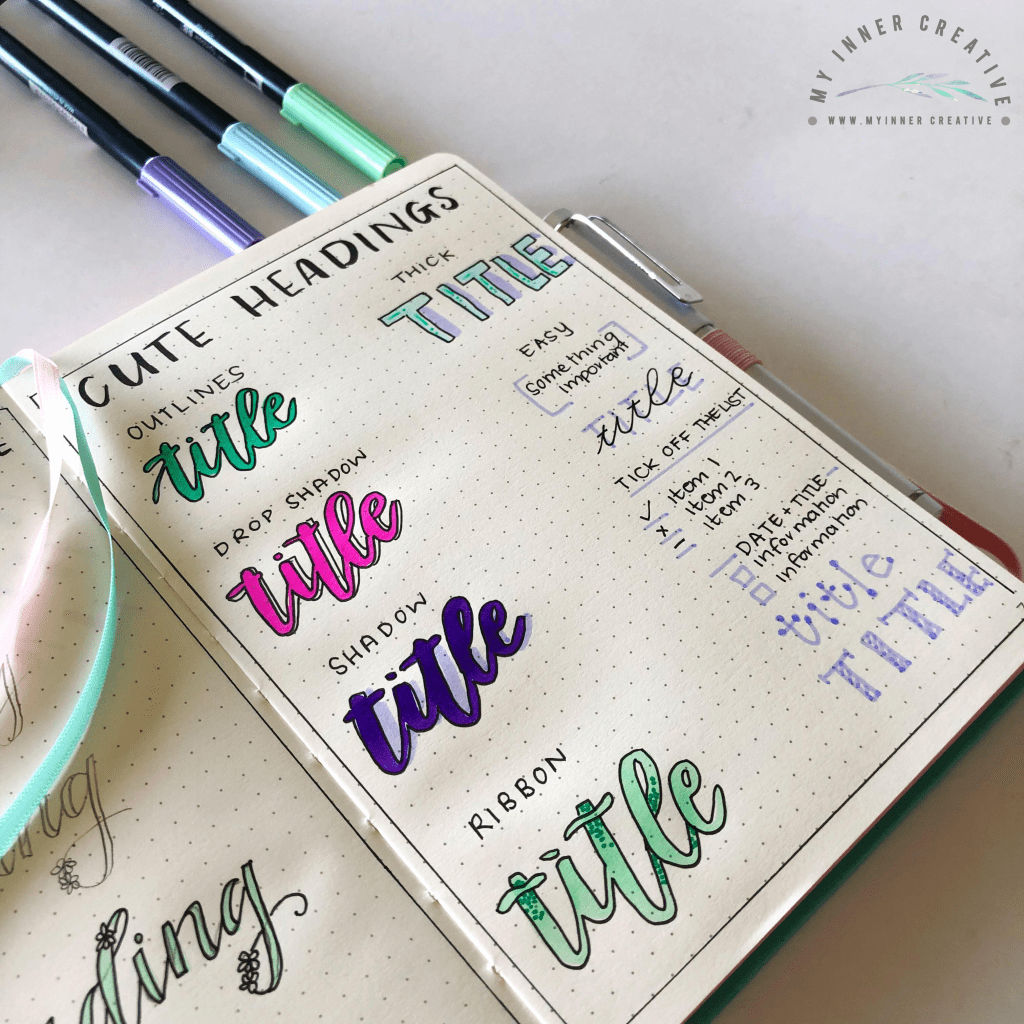
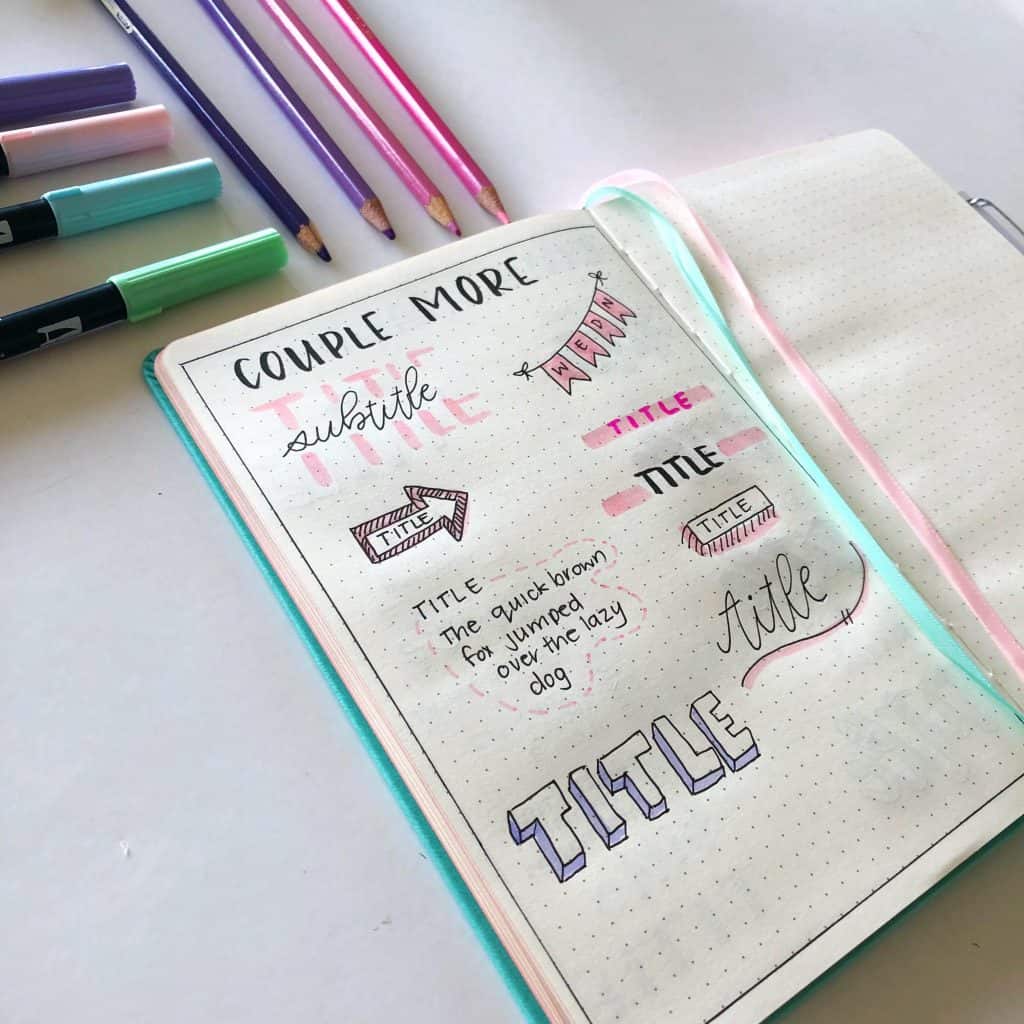
Now that we have these in place, what we’re going to do, is we’re going to go back and I’m going to use a gray brush pen to create a drop shadow. We’re going to create some shadowing, we’re going to create a ribbon, and we’ll go into create an outline for these headers. So, same simple process. And each one we’re going to do something different. So, we’re going to start with the top one over here. And we are going to take our fine liner, and we are going to just do a border all the way around the word.
All right, let’s move onto the next one where we are going to create a drop shadow all the way around the word.
Now, we’re going to go around. We’re going to use the same technique we just used here to create a border, and then we’re going to go round and create this drop shadow. Now, you’ve got to imagine where the light of your drop shadow is coming from. And we’re going to have the light coming from this side. So use your pencil and just show yourself that your light is coming from this side, which means your shadow will be on the other side.
All right. Really simple. Now, the next thing we’re going to do, is we’re going to create a shadowing effect just with a gray brush pen. Again, we’re going to go down all of those thick parts there with the down thick strokes.
Now, we’re going to go back and create a ribbon. So again, we’re going to use the same technique we used up at the top but this time we’re going to close off. See here, we have them open. This time, I’m going to close them off to make a ribbon. And now grab yourself a darker color than what is currently in there. And we’re going to highlight with, oops, that’s not the darker color, that’s black.
We’re going to use a pink. And we’re going to highlight where the ribbon overlaps. Super simple.
Some Inspirational bullet journal Headers!
If you want some additional bullet journal header inspiration, these creative journalists have you covered! They have created amazing ideas for headers in your bullet journal, some advanced lettering and some are really easy to try. (Click on the image to go straight to their insta page)
If you want more calligraphy ideas for your bullet journal head here to check them out!
27 Simple bullet journal Header Ideas:
Now, let’s delve into a variety of simple yet stylish header ideas that you can incorporate into your bullet journal:
1. Classic Cursive: A timeless choice, elegant cursive headers add a touch of sophistication to your entries.
2. Bold and Blocky: Embrace block letters for a bold and impactful statement.
3. Minimalist Line Art: Combine simple lines with your headers for a sleek and minimalist look.
4. Nature-Inspired: Incorporate elements like leaves, flowers, or waves into your lettering for a natural feel.
5. Geometric Shapes: Experiment with triangles, circles, or squares to create headers that stand out.
6. Watercolor Wash: Add a soft watercolor wash behind your headers to create a dreamy effect.
7. Double Outlines: Outline your letters twice with different colors to make them pop.
8. Shadow Effect: Create a shadow behind your letters for a 3D effect.
9. Doodle Frames: Draw simple doodles around your headers to add a playful touch.
10. Highlighter Glow: Use a bright highlighter to color in your headers for a vibrant look.
11. Pastel Palette: Opt for soft pastel colors to bring a gentle and calming vibe to your journal.
12. Monochrome Magic: Stick to a single color for your headers to create a cohesive and polished appearance.
13. Banner Style: Draw banners above your headers to give them a decorative edge.
14. Gradient Blend: Experiment with blending two or more colors within each letter for a unique gradient effect.
15. Chalkboard Charm: Simulate a chalkboard look by adding a bit of texture to your headers.
16. Artistic Initials: Make the first letter of your header intricate and decorative, setting the tone for the entire word.
17. Outlined Ombre: Apply an ombre effect to your letters and outline them with a contrasting color.
18. Playful Swirls: Incorporate curly swirls around your headers for a whimsical touch.
19. Faux Calligraphy: Create the illusion of calligraphy by thickening certain parts of each letter.
20. High Contrast: Pair a dark-colored background with bright headers for high contrast impact.
21. Underline Elegance: Draw elegant underlines beneath your headers, experimenting with various designs.
22. Rustic Texture: Add a hint of a rustic feel by using textured paper or drawing in a rustic style.
23. Mixed Fonts: Combine different fonts within a single header for a dynamic and eclectic look.
24. Stamped Effect: Mimic the look of stamped letters with slightly uneven lines.
25. Whimsical Doodles: Integrate playful doodles that reflect the theme of your entry around the header.
26. Pop of Gold: Incorporate a touch of metallic gold into your headers for a luxurious feel.
27. Minimalist Serif: Choose a simple serif font for a minimalist yet stylish header style.
Remember, the beauty of bullet journaling lies in its adaptability and personal touch. Feel free to mix and match these header ideas, tweak them to suit your style, and let your creativity flow. Whether you’re a calligraphy enthusiast or just starting, these simple header ideas will surely add a delightful flair to your bullet journal pages. Happy journaling!
